“Under braking in Sport or +R modes, the car skipped over pavement
ripples until we switched the adaptive dampers to Comfort mode.”
– Car and Driver, 2023 Honda Civic Type R at Lightning Lap 2023, February 2023
Having tracked cars for nearly 20 years, I took note of this criticism by the experts at C&D, and figured if there was a way to address this issue, I’d do it. Most performance enthusiasts realize that if a car’s tires aren’t maintaining contact with the road surface, traction is going to be compromised, and the fast way around a track is usually involving maintaining maximum traction to keep speed in every section of the track.
Fast forward to time spent on the 11th Gen Type R forums, and users started to discuss swapping in the Active Damper Module (ADM) (Acura part number 39381-31M-A03) from the plushier Acura Integra Type S (ITS), into the Honda Civic Type R (CTR), and thus taking the harsh edge off the Type R’s three modes for its adjustable damper settings (Comfort, Sport, R+). Most of the folks who were investigating this mod said they were looking to lessen the jarring ride of the CTR on the street, and not much emphasis was being put on the performance aspect.
Since the weather was really nice today, it was time to spend a little time out in the garage and start whittling down the pile of parts I have in the basement. First up: the Active Damper Module (ADM) swap.
I watched a YouTube video by another FL5 owner on what he did to swap out his OEM module with the Acura module, and it seemed pretty simple. I did notice that there were several small parts that could use some detail. The overall process is as follows:
- Remove the back seat pad.
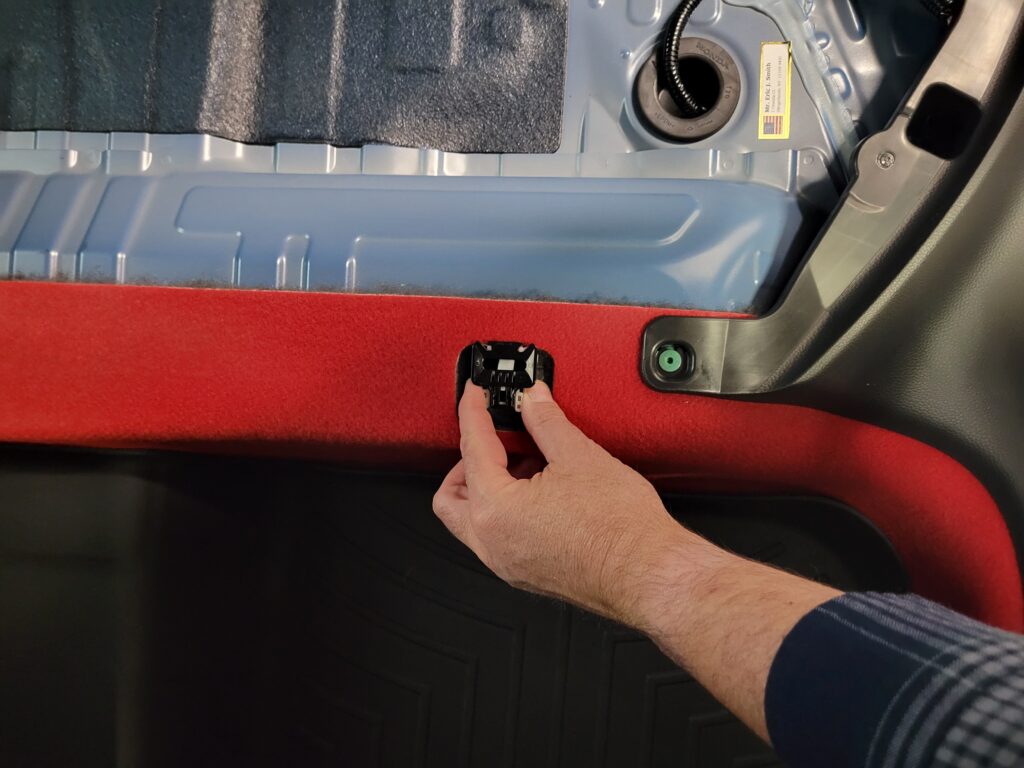
- Remove the left side bolster air bag module & trim piece.
- Unplug the OEM ADM unit from the wire harness.
- Remove the OEM ADM unit.
- Install the Acura ADM.
- Plug the ADM harness into the ADM unit.
- Reinstall the left side bolster airbag & trim.
- Reinstall the back seat bottom cushion.
Tools needed
- 10mm socket
- Long (6″ or more) socket extender (needed for the seat bottom cushion removal
- Flat blade screwdriver or similar to gently pry a trim panel cover on the air bag bolster
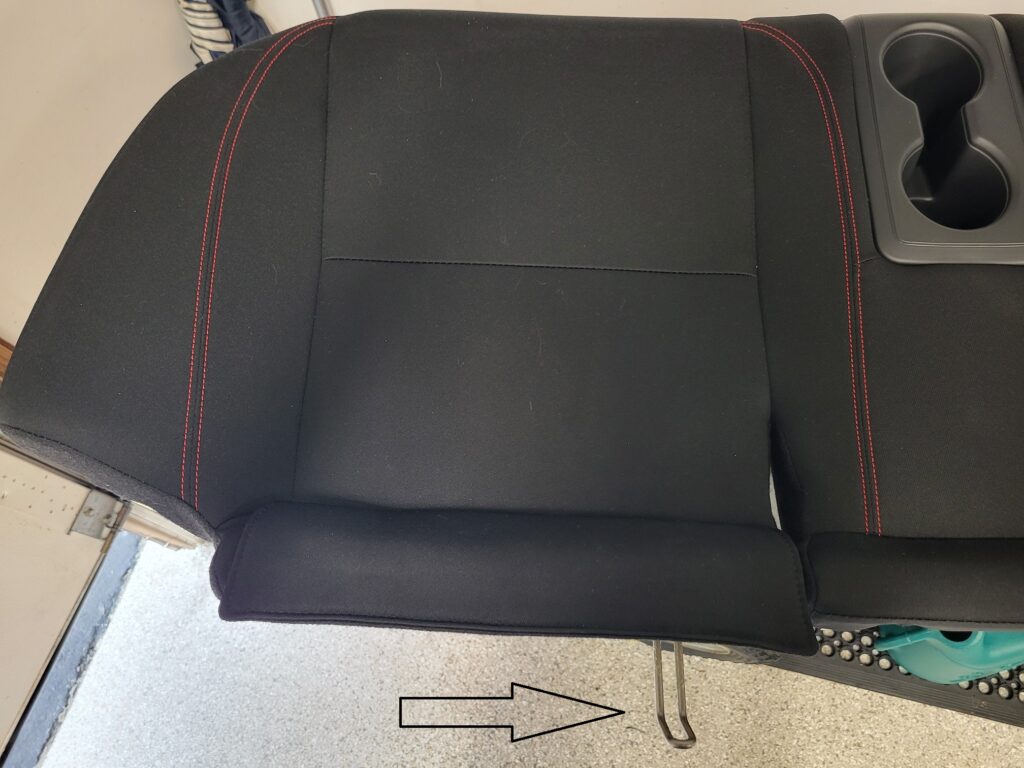
For the back seat bottom cushion removal, I was confused as to how to release the two catches under the front edge of the bottom cushion. After I figured it out, I ended up reattaching the catches as I had to kneel on the seat cushion to find the single 10mm bolt that holds the seat cushion in place. Hint, it’s about 2-3″ to the right of the driver side seat belt latch as you face the rear of the car. Here’s the metal bracket molded into the rear seat cushion’s back edge:


Feel around under the cushion, and you’ll find these catches. What I finally figured out was to grab the front portion of the catch, pull it horizontally towards the backs of the front seats, and the cushion will pop up. It should pop up as you’ll have to put some pressure on that cushion to fit your hands/fingers in to release the catches. I started on the passenger side and then
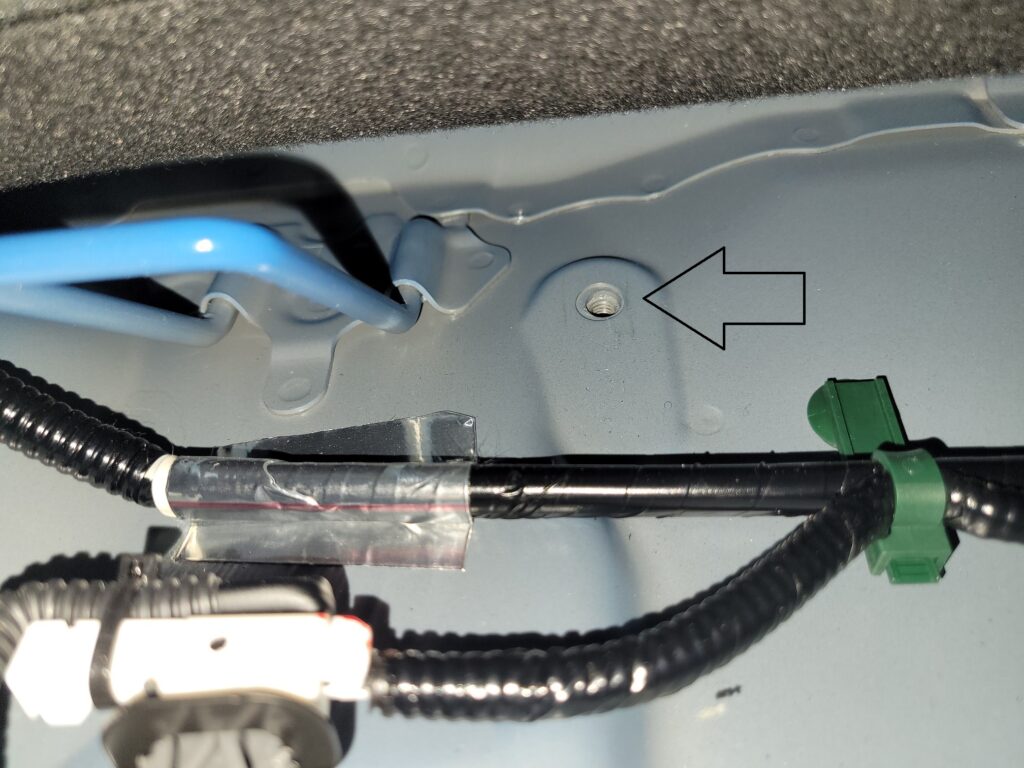
When you reinstall the rear seat bottom cushion, you’ll need to find the hole to reinstall the 10mm bolt you removed earlier. Once you get the seat cushion in place, make sure the catches latch it into place. At that point, the metal bracket in the seat bottom should be lined up properly with the bolt hole in the trunk dividing panel. I had to feel around as it’s pretty difficult to see it. I ended up putting the bolt in the socket, held it by the socket extension, and then gingerly started the bolt in the thread. Here’s what you’re looking for:

The metal bracket in the seat cushion should line up pretty well with this bolt hole once the seat cushion is latched back into the catches on the front edge.
It took me just under 30 minutes to perform this swap, and that was with fumbling around to figure out how the bottom catches work, taking pictures, and figuring out the cushion’s bolt needed to come out before unlatching the catches. Super simple!
